

I'm too excited about this DIY. As I have mentioned before I'm throwing a shower for my soon to be sister in law in about 2 weeks now. I wanted to contribute as much handmade decor to the party as I could.
This project is super simple, and really easy! The only downside is that it spans out over a long amount of time and I'm not always what you would call "patient."
You'll need 4 things:
-A plate
-A glass vase or candlestick holder (I used a vase)
-A pencil (I used a marker..haha not my best idea)
-A pencil (I used a marker..haha not my best idea)
-Heavy duty glue. ( I use liquid fusion, unlike other glues it doesn't expand and sets in 4-5 hours!)

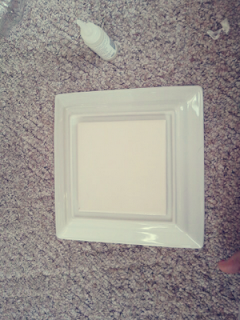
So step one for you was not step one for me. When I tried to find the middle of my plate and get an idea of how to place my vase, I found that fun little square outline on the bottom, making it impossible for vase to sit steadily against it...


STEP TWO:
Outline the bottom of your vase with a pencil...you'll notice I used a marker..not my smartest idea since the green is pretty noticable, luckily its on the bottom. :)
And don't worry it if it doesn't show up well, since you just need an idea of where to place your glue.
 STEP THREE:
Now this one is a toughy... put glue on the inside of your pencil mark and place your vase down on your plate.


So step one for you was not step one for me. When I tried to find the middle of my plate and get an idea of how to place my vase, I found that fun little square outline on the bottom, making it impossible for vase to sit steadily against it...

Luckily my father is handy man and had a box full of ceramic white tile squares in my garage! Even if you don't have these in your garage, they are super cheap at home depot! But I would just suggest finding a plate you like with a flat bottom :)

So now we can really get started...
STEP ONE:
turn your plate upside down, and eye ball or measure to find the middle of your plate..where I'm guessing you want to place your vase :)
Oh! Also decide whether you want your vase upside down or upside right!
(I originally was going to spray paint my plates..but decided not to so I could use it for more than a bridal shower...But I also decided to put my vase upside down so that I could fill it with flowers..or even just streamers to help it fit in more at parties.)

Outline the bottom of your vase with a pencil...you'll notice I used a marker..not my smartest idea since the green is pretty noticable, luckily its on the bottom. :)
And don't worry it if it doesn't show up well, since you just need an idea of where to place your glue.

Now this one is a toughy... put glue on the inside of your pencil mark and place your vase down on your plate.


STEP FOUR:
Let it set. Like I said liquid fusion sets really quick (by quick I mean not 24 hours), so I let mine sit upside down for 5 hours, then I turned it right side up and let it sit through the night..just to be safe! :)

All in all I'm thoroughly excited about how this turned out. :)
P.s. notice the sneak peek at my bridal shower decorations..I'm excited about those too! :)
So not diy related..
I'm sure you've all seen the golden pictures "Pinned it. Nailed it." Well....


Yeah needless to say...I should find something else to do with my crepe paper.
If you have any ideas via your mind or pinterest..don't hesitate to tell cause I literally bought 8 rolls...so...yeah.
No comments:
Post a Comment
Insert clever &/or gracious response here.